I Tried Blurry Background Technique and Here's What Happened
Hello! Today we’re going to learn how to create the effect or illusion of depth of field when everything in the photo is in focus. Normally, you would achieve this effect in-camera or through software. Right now, I’m going to show you three different ways to do this using a program like Photoshop. Let’s get started!
Method 1: Using a Mask and Feathering
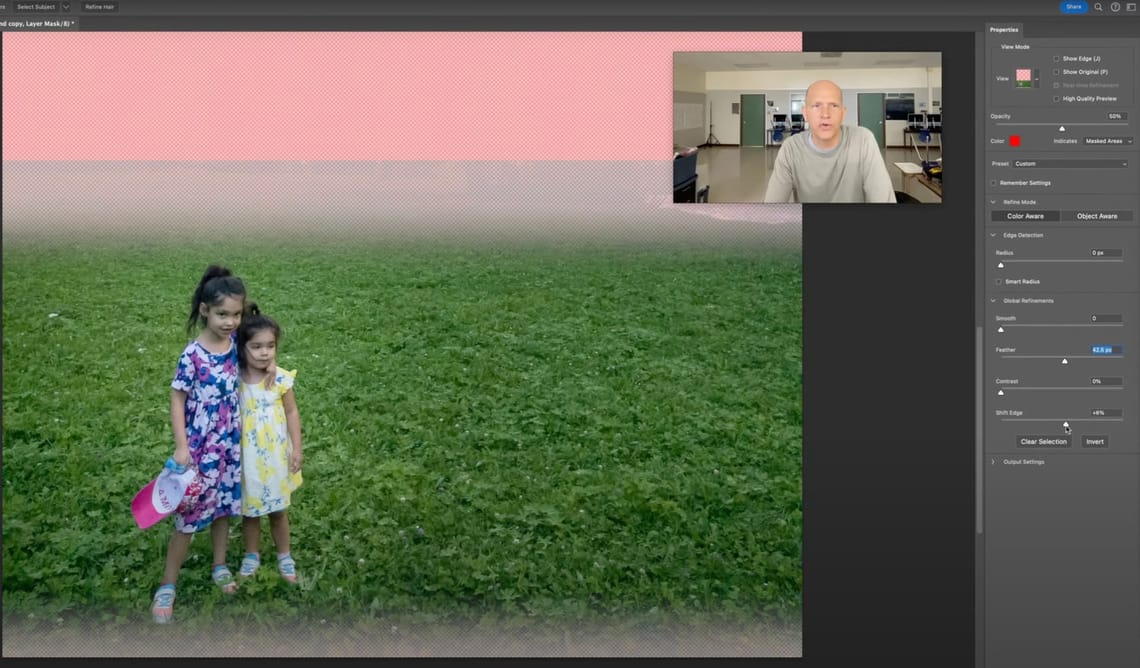
For my first method, I have a picture of my daughters in Switzerland. The whole picture is in focus, but I want to create the illusion of depth of field. Here’s how I do it:
1. Select the Subject:
I zoomed in using Command + Plus on my Mac and held the spacebar to navigate. I selected the Lasso Tool and manually drew a rough selection around the subjects, leaving some space. This method is quick and works well, but the effect might not be as polished.
2. Duplicate the Background Layer:
Right-click on the background layer and select Duplicate Layer.
3. Create a Mask:
Add a Layer Mask to the duplicate layer. You can refine the mask by feathering it. Double-click the layer mask and adjust the Feather slider. Use the Overlay view (red background) to see the mask more clearly. Feathering softens the edges of the mask.
4. Blur the Background:
Select the bottom layer (the original background), then go to Filter > Blur > Lens Blur. Adjust the blur settings as needed. For depth map settings, select Layer Mask as the source. Set the blur strength to something that looks natural—too much will make it look fake.
Alternatively, you can use Gaussian Blur for the mask edges. Double-click the mask, apply Gaussian Blur, and adjust the radius to create a softer transition.
Method 2: Neural Filters (If Available)
This method works well if you have access to Neural Filters in Photoshop. Here’s how to use them:
1. Duplicate the Layer:
Duplicate the background layer for safety and work on the duplicate.
2. Enable Neural Filters:
Go to Filter > Neural Filters and look for Depth Blur. If it’s not enabled, download it from the menu.
3. Adjust Depth Blur Settings:
• Set Focus Subject to ensure the subject remains sharp.
• Lower the Blur Strength to make the effect more believable.
• Adjust the Focal Length to refine the transition.
• You can also experiment with Temperature, Brightness, and Haze to create a specific mood. Add a bit of grain if desired for a more natural look.
Neural Filters are powerful but can sometimes look artificial if the settings are too strong, so adjust them carefully.
Method 3: Rectangle Marquee and Masking
If Neural Filters aren’t available, here’s another effective approach:
1. Select the Subject with the Rectangle Marquee Tool:
Use the Rectangle Marquee Tool to create a rough selection around the subject, leaving extra space.
2. Duplicate the Selection:
Duplicate the selection as a new layer and add a Layer Mask. Feather the mask or use Gaussian Blur to soften the edges.
3. Blur the Background:
Go to Filter > Blur > Lens Blur on the background layer. Use the Layer Mask as a depth map source. Adjust the blur to keep the subject sharp while blurring the background slightly.
This method allows you to control the blur manually and creates a realistic depth effect.
Additional Tips
• If you’re using an iPhone or a similar device and didn’t capture the depth effect in-camera, these Photoshop techniques are a great alternative.
• Always adjust the blur strength to avoid an artificial look. Subtlety is key to making the effect believable.
• Experiment with colors and filters in the background to enhance the overall composition.
Using these methods, you can create stunning photos with a shallow depth of field effect, even if you don’t have an expensive camera or a lens with a large aperture. This photo was taken with my iPhone, and Photoshop helped me achieve the look of professional depth of field.
Hopefully, these techniques inspire you to create amazing images with depth and focus!

