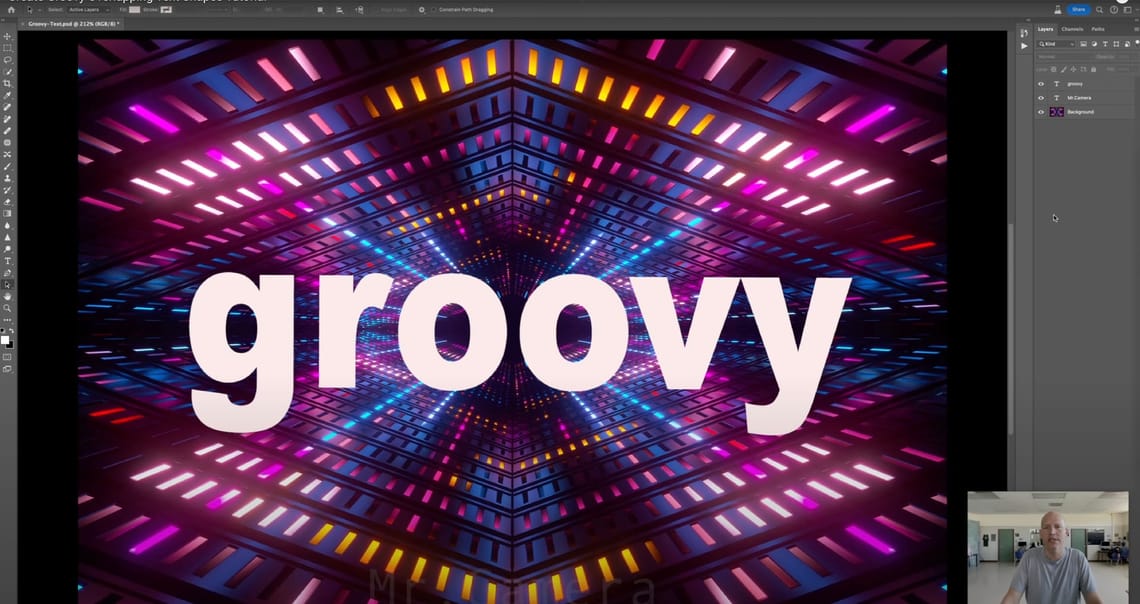
Create Groovy Overlapping Text Shapes Tutorial
Welcome to this tutorial! We’re going to change this text around, move it around, convert it to a shape, overlap it, exclude it—we’re going to do some really cool things.
The first thing that you’re going to want to do with this image is you’re going to want to select this text that says “groovy,” and then you’re going to want to go up here to Type and convert it to a shape. Make sure you’re following every step closely; otherwise, you could get messed up. So, convert it to a shape.
Now we’re going to click the background so that it deselects all of this text right there. Okay, now you want to make sure that you have your tool on the Path Selection Tool. Then click this “G” right here, and you should see that only the “G” is selected. You’re going to go up here to Edit and then to Free Transform Path. Now we’re going to turn this to maybe -20 degrees. Honestly, you can turn it to whatever you want, but for this tutorial, I’m turning it to -20. Then hit Return, and I’m going to just overlap it. I’m just going to keep on moving it around there.
Now I’m going to do the same thing with the “R,” except I’m going to twist it the other way. So, I’m going to select my “R,” go up here to Edit, and go to Free Transform Path. Now I’m going to turn it the other way. How much? You know, it just depends on what you want to do. Then I’m going to hit Enter or Return.
I’m going to do the same thing with the “R.” Select the “R,” go up to Edit, Free Transform Path, twist it the other way, move it a little bit so it’s overlapping, come out of it, and hit Return or Enter. Select the background. Now I’m going to select this “R” here and go up to Edit, Free Transform Path, twist it around a little bit the other way, and move it.
You guys can use your own thoughts on how you want to do it, but the idea is you want them all overlapping and kind of turning a little bit. So, a little lopsided there. Let’s click the “V” and do the same thing. Come up here to Edit, Free Transform Path, turn it around to the left, tilt it, and go like that with it. Hit Enter or Return.
Then I’m going to select this “Y,” and I’m going to go up here to Edit, Free Transform, and that will allow me to turn it like that. Hit Enter, and click out.
Now there’s an important step. Now that you’ve got the letters all kind of lopsided, turned around, and doing different things, you can kind of put your own spin on it, so to speak. I’m now going to take the Path Selection Tool and make a big rectangle over the whole thing. From here, I’m going to go up here to, I believe—where is it? Oh, here it is. It’s going to be the Path Operations. You’re going to click on there and go down to Exclude Overlapping Shapes.
Now you’re going to see the different parts kind of almost like you can see behind it. If I’m not mistaken, we can also move the whole thing over, kind of center it to where you want it centered.
There you go! That’s how you can do some really cool stuff using the Path Selection Tool, converting to a shape, and actually using the tool up in Edit > Free Transform Path. You can move each letter the way you want it and then exclude the overlapping parts so you can actually see through the letters.
Hope you got something out of it that you like!


