Amazing Lighting Effect in Background of Image
Hello! Today, I’m going to show you how to create a cool background lighting effect.
The first thing we’re going to do is select the subject. Go up to Select, but make sure the background layer is selected first. Then, go to Select > Subject. This will select the subject. The next step is to copy this selection. Go to Layer > New > Layer Via Copy. Make sure to choose Copy and not Cut. Now, we’ve made a copy of just the subject on a new layer.
Next, we need to create a new layer. Over on the layers panel, click the little plus icon to create Layer 2. Drag this new layer between Layer 1 (the subject) and the background layer. This will position it correctly for the effect we’re about to create.
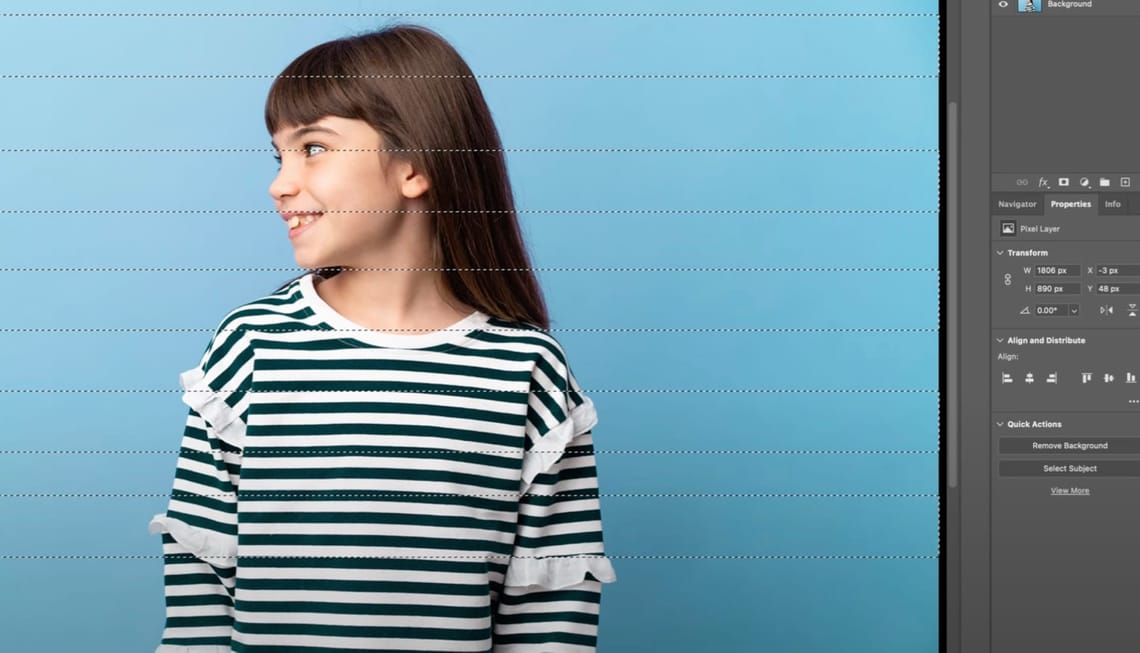
Now, we’re ready to start the process for the lighting effect. First, select the Rectangle Marquee Tool. Use it to create a selection outside of the photo that goes all the way across the canvas. Make the selection about 100 pixels wide. If you want to add more stripes, hold down Shift as you create additional selections. This allows you to add to your selection without losing the previous ones. Create five stripes, spacing them roughly evenly.
Once you have all the stripes selected, go to Select > Modify > Feather. Set the feather radius to 15 pixels and click OK. Next, fill these selections with white. Make sure your foreground color is set to white. Then, go to Edit > Fill, choose Foreground Color, and click OK. Now, your stripes should be filled with white.
Deselect the selection by going to Select > Deselect. This will remove the active selection. After that, go to Edit > Transform > Perspective to adjust the perspective of the white stripes. Drag the top corner of the selection down to about 8 degrees. When you’re done, press Enter, Return, or click the checkmark to confirm the transformation.
Next, add a Layer Mask to the stripes layer. Click the rectangle icon with a circle in the middle in the layers panel to create the mask. Then, select the Gradient Tool. On the layer mask, drag the gradient from the right edge of the canvas to the left. This will create a fade effect. Adjust the gradient to blend it smoothly into the background.
Finally, lower the opacity of the stripes layer to about 65%. This will soften the effect and make it blend more naturally.
And that’s it! You’ve created a cool lighting effect in the background. You can save your work as a Photoshop file to preserve all the layers, or as a JPEG if you’re happy with the final result. To save, go to File > Save a Copy and choose your preferred format.
Hopefully, you can use this tutorial to create some amazing background lighting effects!